
This lesson is made with PSPX9
But is good with other versions.
© by SvC-Design

Materialen Download :
Here
******************************************************************
Materials:
blokje.png
butterfly.png
chicken.png
deco-Eastermorning-Ri@.png
deco-glamour.png
deco-glamour-2.png
kleuren-easter morning.jpg
NarahsMasks_1622.jpg
Ri@masker18052018-5.jpg
tekst-eastermorning-Ri@.png
******************************************************************
Plugin:
Plugins – Vm Distortion – Circulate II
Plugins – Mehdi – sorting tiles
Plugins – Mura's Meister – Copies
******************************************************************
color palette
:

******************************************************************
methode
When using other tubes and colors, the mixing mode and / or layer coverage may differ
******************************************************************
General Preparations:
First install your filters for your PSP!
Masks: Save to your mask folder in PSP, unless noted otherwise
Texture & Pattern: Save to your Texture Folder in PSP
Selections: Save to your folder Selections in PSP
Open your tubes in PSP
******************************************************************
We will start - Have fun!
Remember to save your work on a regular basis
******************************************************************
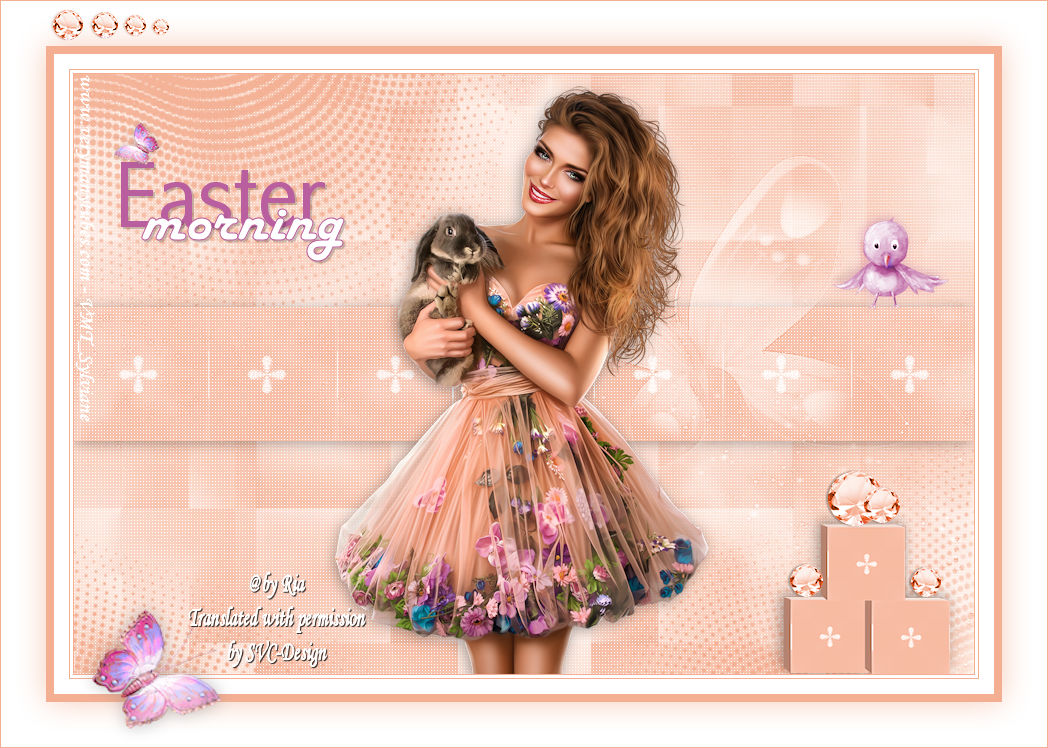
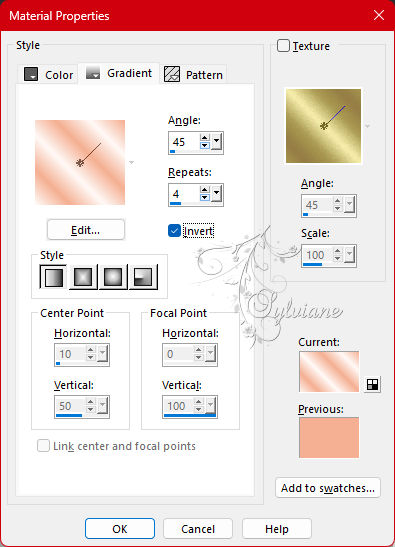
1.
Foreground color #f4af93.
Background color # fef9f6
Gradient - Linear - angle 45 - repeats 4 - check mark for invert
2.
Open a transparency of 900 – 600 pixels.
3.
Fill the image with the gradient.
4.
Adjust – Blur – Gaussian Blur – Range 40.
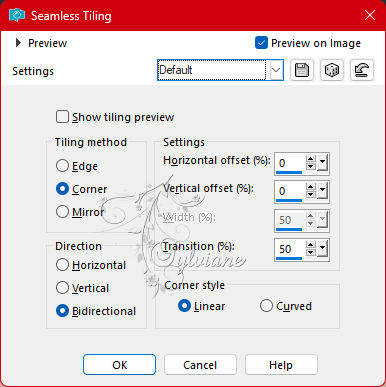
5.
Effects - Image Effects - Seamless Tiling – default.
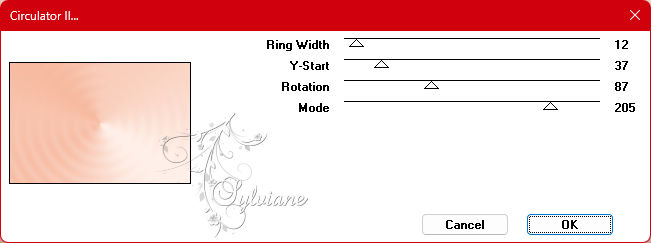
6.
Plugins – Vm Distortion – Circulate II – default.
7.
Effects – Edge Effects – Enhance more.
8.
Effects - Image Effects - Seamless Tiling – Default
9.
Plugins – Mehdi – sorting tiles.
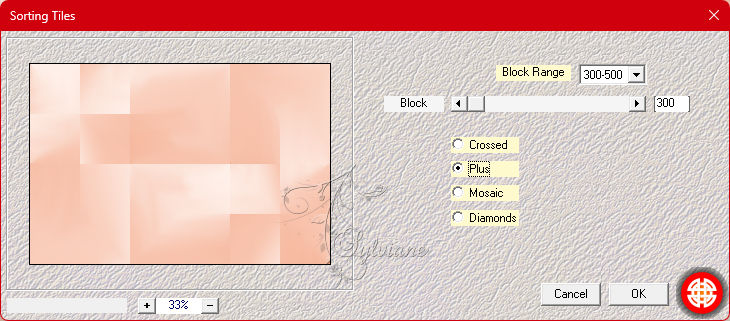
10.
Effects – Reflection Effects – Kaleidoscope.
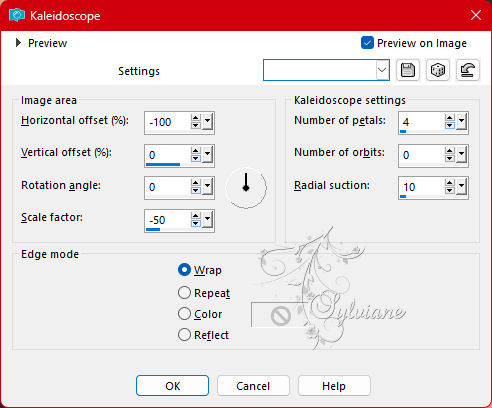
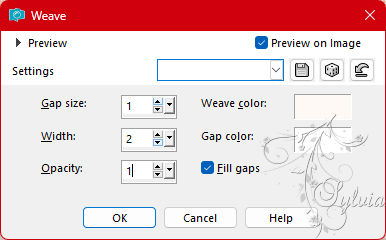
11.
Effects - Texture Effects – wave- both colors are the background color.
12.
Layers – duplicate.
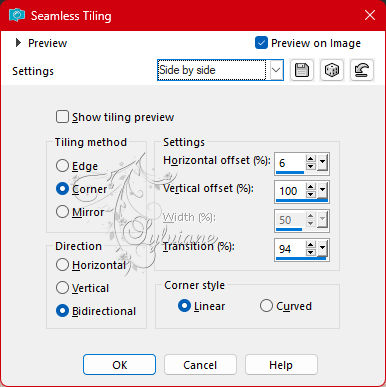
13.
Effects - Image Effects - Seamless Tiling – choose in the drop-down menu for side by side.
14.
Layer Opacity 50.
15.
Open blokje.png
Edit – copy.
Back to your image.
Edit - paste as new layer.
This one looks good right away.
16.
Plugins – Mura's Meister – Copies.
Choose Line – top option 7 in the drop-down menu, the rest looks good.

17.
Effects - Texture Effects – wave – still good.
18.
Effects - 3D effects - drop shadow.
2/-2/35/20 color:#000000
19.
Layers – new raster layer.
20
Fill with the background color.
21.
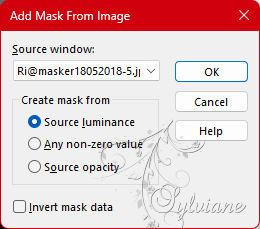
Layers – New Mask Layer – From Image.
Open the mask Ri@mask18052018-5 – Uncheck invert.
22.
Layers – merge – merge group.
23.
Effects - Edge Effects - Enhance
24.
Blend Mode – Overlay.
25.
Layers – new raster layer.
26.
Fill with the foreground color.
27.
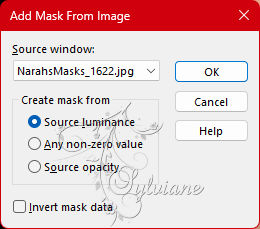
Layers – New Mask Layer – From Image.
Open the mask NarahsMasks_1622 – Uncheck invert.
28.
Layers – merge – merge group.
29.
Layers – arrange – move down.
30.
Repeat this one more time.
31.
Activate the top layer.
32.
Open the tube deco-Eastermorning-Ri@.png
Edit – copy.
Back to your image.
Edit - paste as new layer.
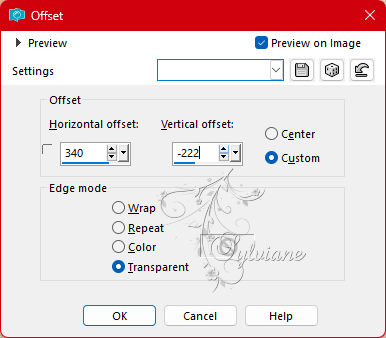
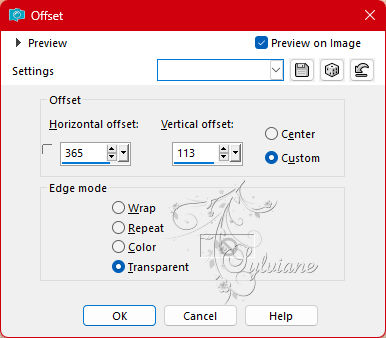
33.
Effects – image effects – offset.
34.
Open deco-glamour.png
Edit – copy.
Back to your image.
Edit - paste as new layer.
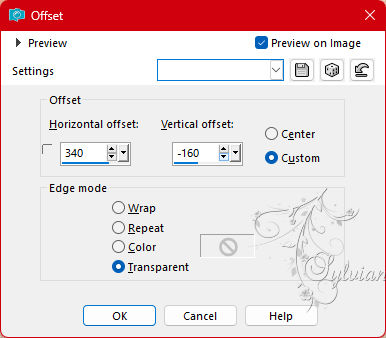
35.
Effects – image effects – offset.
36.
Open chicken.png
Edit – copy.
Back to your image.
Edit - paste as new layer.
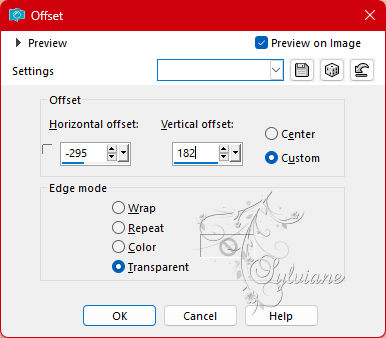
37.
Effects – image effects – offset.
38.
Open the tekst-eastermorning-Ri@.png
Edit – copy.
Back to your image.
Edit - paste as new layer.
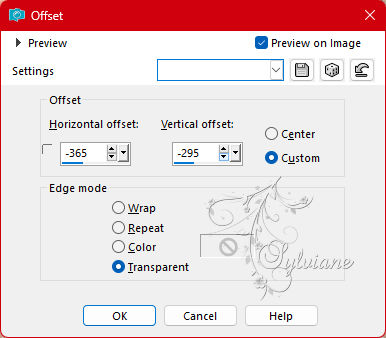
39.
Effects – image effects – offset.
40.
Open your chosen tube.
Edit – copy.
Back to your image.
Edit - paste as new layer.
Place the tube in the center.
41.
And give it a nice drop shadow.
42.
Layers – merge – merge all layers.
43.
Image – add borders – 1 pixel foreground color.
44.
Image – add borders – 3 pixels color white.
45.
Image – add borders – 1 pixel foreground color.
46.
Image – add borders – 15 pixels color white.
47.
Image – add borders – 8 pixels foreground color.
48.
Selections – select all.
49.
Image – add borders – 45 pixels color white.
50.
Effects – 3D Effects – Drop Shadow
0/0/65/45 - foreground color.
51.
Selections – select none.
52.
Open the butterfly.png
Edit – copy.
Back to your image.
Edit - paste as new layer.
53.
Effects – image effects – offset.
54.
Open the deco-glamour-2 tube.
Edit – copy.
Back to your image.
Edit - paste as new layer.
Place left at the top in the wide edge.
55.
Place your name or watermark.
56.
Layers – merge – merge all layers.
57.
Image – borders – add – 1 pixel foreground color.
58.
Image – resize – 600 pixels – longest sides.
59.
Save as JPEG
Back
Copyright Translation 2023 by SvC-Design